Tech Design
Raycast projectiles based on delta-movement
This is a good approach to prevent fast bullets from crossing walls. A raycast based on direction and speed is used to predict the next bullet movement and detect a hit, if any.
C#
Physics2D.HitCollection hits = frame.Physics2D.LinecastAll(bulletTransform->Position, futurePosition);
for (int i = 0; i < hits.Count; i++)
{
  var entity = hits[i].Entity;
  ...
  if (entity == EntityRef.None)
  {
    bulletTransform->Position = hits[i].Point;
    // Applies polymorphic behavior on the bullet action
    data.BulletAction(frame, bullet, EntityRef.None);
    return true;
  }
}
Disconnect system
Using the DeterministicInputFlags we check if the player is present. So, the entities of players who are not present for a while are removed from the simulation.
C#
public override void Update(Frame frame)
{
  frame.Global->DisconnectTime += frame.DeltaTime;

  var robotsFilter = frame.Filter<PlayerID, Status>();
  while (robotsFilter.NextUnsafe(out var robot, out var playerID, out var robotStatus))
  {
    DeterministicInputFlags flags = frame.GetPlayerInputFlags(playerID->PlayerRef);

    if ((flags & DeterministicInputFlags.PlayerNotPresent) == DeterministicInputFlags.PlayerNotPresent)
    {
      robotStatus->DisconnectedTicks++;
    }
    else
    {
      robotStatus->DisconnectedTicks = 0;
    }
    if (robotStatus->DisconnectedTicks >= 15)
    {
      frame.Destroy(robot);
    }
  }
}
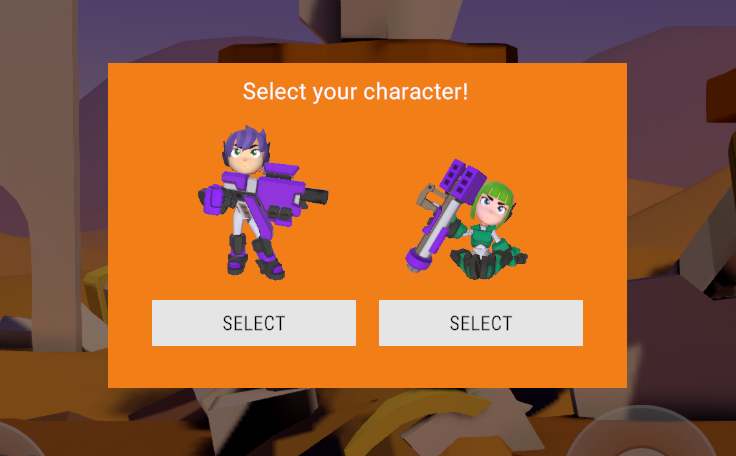
Character selection screen during the simulation
This is an alternative to creating a lobby screen before the game. It often proofs to be difficult to handle all edge cases of controlling the lobby using Photon Realtime properties without having an authoritative server and Quantum 3 gives a lot of new tools to secure the player configurations in the end.
Having the selection process inside the simulation is on the other hand very secure and error-proof.
This sample already lets the simulation start, while postponing adding a player to the game until after the character selection.
See the CharacterSelectionUIController.cs that handles the UI and finally creates a RuntimePlayer object and requests to add a player.
C#
RuntimePlayer playerData = new RuntimePlayer();
playerData.PlayerAvatar = characterPrototype;

var menu = FindObjectOfType<Quantum.Menu.QuantumMenuUIController>();
if (menu != null) {
    playerData.PlayerNickname = menu.DefaultConnectionArgs.Username;
}
runner.Game.AddPlayer(playerData);
Open the PlayerSystem.cs script inside the simulation that listens to the ISignalOnPlayerAdded signal to create the player avatar after the add player request was confirmed.
C#
EntityRef character = frame.Create(prototypeAsset);
PlayerLink* playerLink = frame.Unsafe.GetPointer<PlayerLink>(character);
playerLink->PlayerRef = player;
RespawnHelper.RespawnRobot(frame, character);
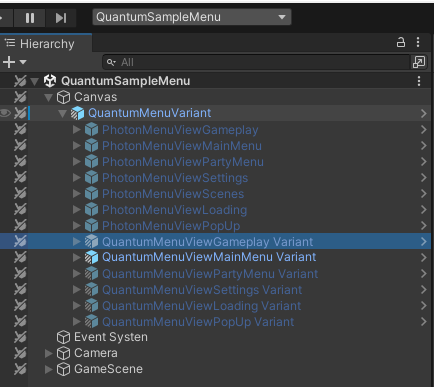
Customized menu
The game sample uses Sample Menu Customization and prefab variants to create a different look of the Quantum sample menu while still being compatible to upgrades.
Customization like this could be used for prototypes.