Getting Started
Requirements
- Unity Editor 2022.3.54
- Supported Platforms: PC (Windows/Mac), WebGL, Mobile (Android, iOS)
Download
Download the sample package either from the Unity AssetStore as a unitypackage or from the Photon website as a zip.
Import the unitypackage into a new Unity project or open the unzipped Unity project folder directly using the recommended Unity Editor version.
Download Table
| Version | Release Date | Download | |
|---|---|---|---|
| 3.0.1 | Jan 17, 2025 | Quantum Platform Shooter 2D 3.0.1 Build 578 | |
Quantum Hub window
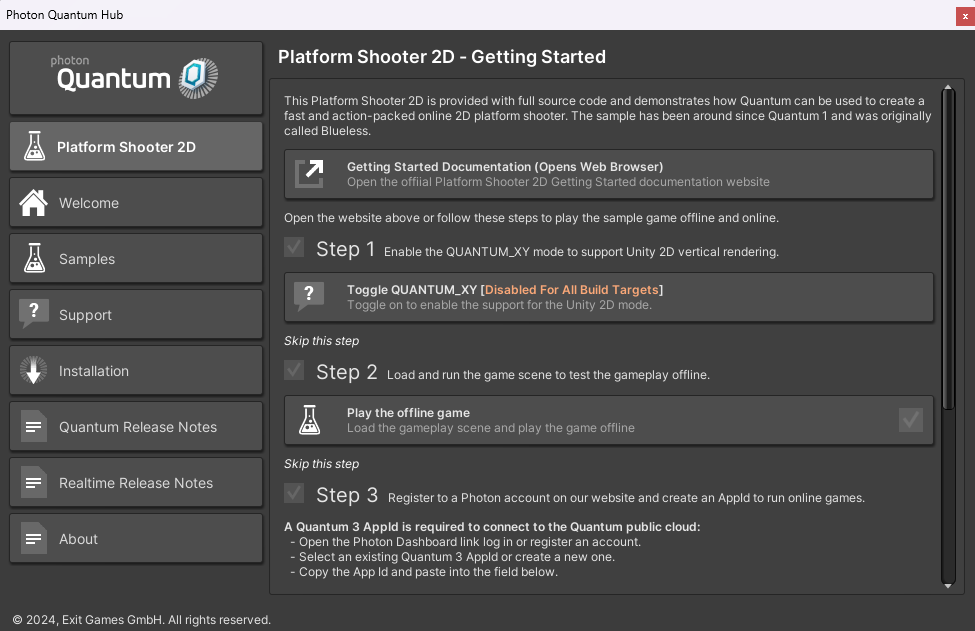
The Quantum Hub window opens automatically after importing or opening the project (press Ctrl+H to open it manually) and shows first steps to get to know this sample.

Step 1: Enable Quantum 2D mode
The Quantum view is in 3D mode by default, to mimic Unity 2D mode an additional define must be set. This option has to be enabled for the Platform Shooter 2D project to work properly.
To change the setting later: select QuantumEditorSettings (Tools > Quantum > Find Config > Quantum Editor Settings) and toggle on Enable Quantum XY.

Step 2: Play the sample game locally and offline
The sample comes with two scenes:
One of them is QuantumGameScene which contains the actual gameplay, a Quantum map with entity prototypes and the QuantumRunnerLocalDebug script to run Quantum in offline mode.
Press the Step 2 button in the Hub or manually load the scene Assets/Scenes/QuantumGameScene.unity and press play.
On the character selection screen click on a character button to join the game.
Gameplay controls and features
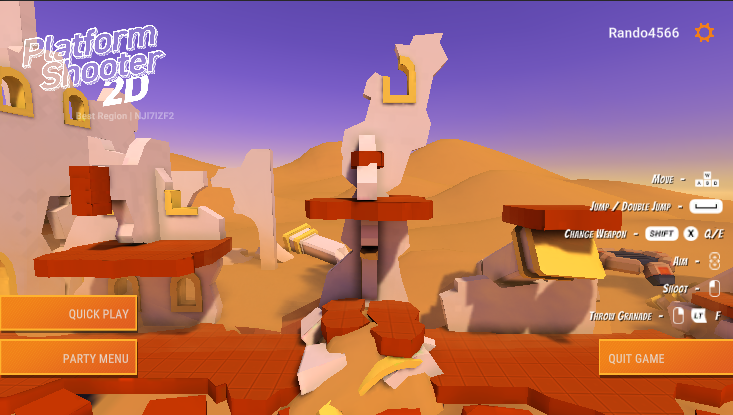
The sample includes keyboard controls and mobile UI button controls for mobile platforms.
- Use
AandSto move left and right - Use the mouse to aim and
Left Mouse Buttonto fire - Press
Spaceto jump - Press
QandEto toggle weapons - Press
Fto throw a grenade
The player character is controlled by a 2D kinematic character controller based on a physics capsule collider that supports common 2D mechanics.
The sample implements two types of weapons with reload times and skills in the form of launching a grenade that does area damage.
Step 3: Creating a Photon Quantum 3 AppId
To run the sample online on the Photon public cloud an AppId is required.
On the Photon Engine Dashboard and a Quantum 3 AppId can be created. It needs to be paste into the Step 3 of the Hub or into the PhotonServerSettings.asset in the Unity project.
Detailed instructions to create and set an AppId can be found here.
Step 4: Play the sample game online
To launch the online game in the Editor press Step 4 on the Hub or open the Assets/Scenes/QuantumSampleMenu.unity scene manually and press play.
Make sure that the QuantumGameScene and QuantumSampleMenu are added to the build settings and that the QuantumSampleMenu is the first one.
The platform shooter 2D demo uses a customized version of the prototyping menu from the Quantum SDK.

Press Quick Play to connect to the cloud and create and join an online Quantum game session.
To play with multiple clients, create builds on one machine and launch multiple instances on the same PC or on different devices.
By default the best (pinged) region is connected to. Clients that are connecting to different regions will not be matched together, instead go to the settings game menu and toggle a region explicitly.

Additionally to the region Photon matchmaking only matches clients of the same AppId and AppVersion together. The Quantum menu is set up to use an AppVersion that is unique to the machine that creates the build, so reduce the chance of matching players of incompatible builds.
Play the sample using Multiplayer Play Mode
Requires Unity 6.
Run through the steps listed in the Quantum Hub or set up MPM manually:
- Install the
com.unity.multiplayer.playmodepackage. - Open the MPM window
Windows > Multiplayer > Multiplayer Play Mode - Toggle at least one virtual player
- Open and run the menu scene and press
Quick Player, the virtual players will automatically start and join the same game session.
Unity MPM is a great step, but it has been fragile while working with it and we expect the feature to continue to mature.